
Here's How: Hang a Ceiling Fan Properly and Safely
Dear James: I bought a ceiling fan two summers ago and am just getting around to installing it this winter. Can this be a one-person job? And do you have any tips? -- Cheryl S.
Dear Cheryl: A ceiling fan is normally thought of for cooling, but it is also effective in the winter. Especially in a room with a fireplace, running the ceiling fan in reverse can keep the warm air evenly distributed throughout the room. Most have a bracket hook for one-person installation.
Make sure you purchased the correct size for your room before trying to install it. If you bought it at a reputable home center store, they will probably let you exchange it for another if the size is incorrect.
As a rule of thumb, use a 36-inch-diameter fan if the largest room dimension is less than 12 feet. From 12 to 15 feet, a 42-inch size is best and from 15 to 18 feet, select a 52-inch size. For very large or long, narrow rooms, use two smaller ceiling fans.
For a standard ceiling height, the fan kit should come with the proper downrod length to provide at least 7 feet of clearance above the floor. Unless your ceilings are unusually low, avoid a ceiling hugger design. The proximity of the blades to the ceiling impedes proper air flow.
Putting up a ceiling fan is not a difficult job. Many of the new ceiling fans have an installation hanging hook built into the ceiling mounting. This makes it a one-person job, assuming that you are strong enough to get it up on the hook first.
Do a little stretching first and, even if you are in good shape, plan on having some sore muscles the next day. It is not so much the weight of the unit as all the twisting and reaching around the motor and blades.
You are lucky that you have an existing light fixture in the ceiling. This cuts the work in half. Turn off the electric power to the light. Don't just turn off the light switch. Make sure to throw the circuit breaker or remove the panel fuse, too. If not, someone may walk into the room and switch on the light as a matter of habit.
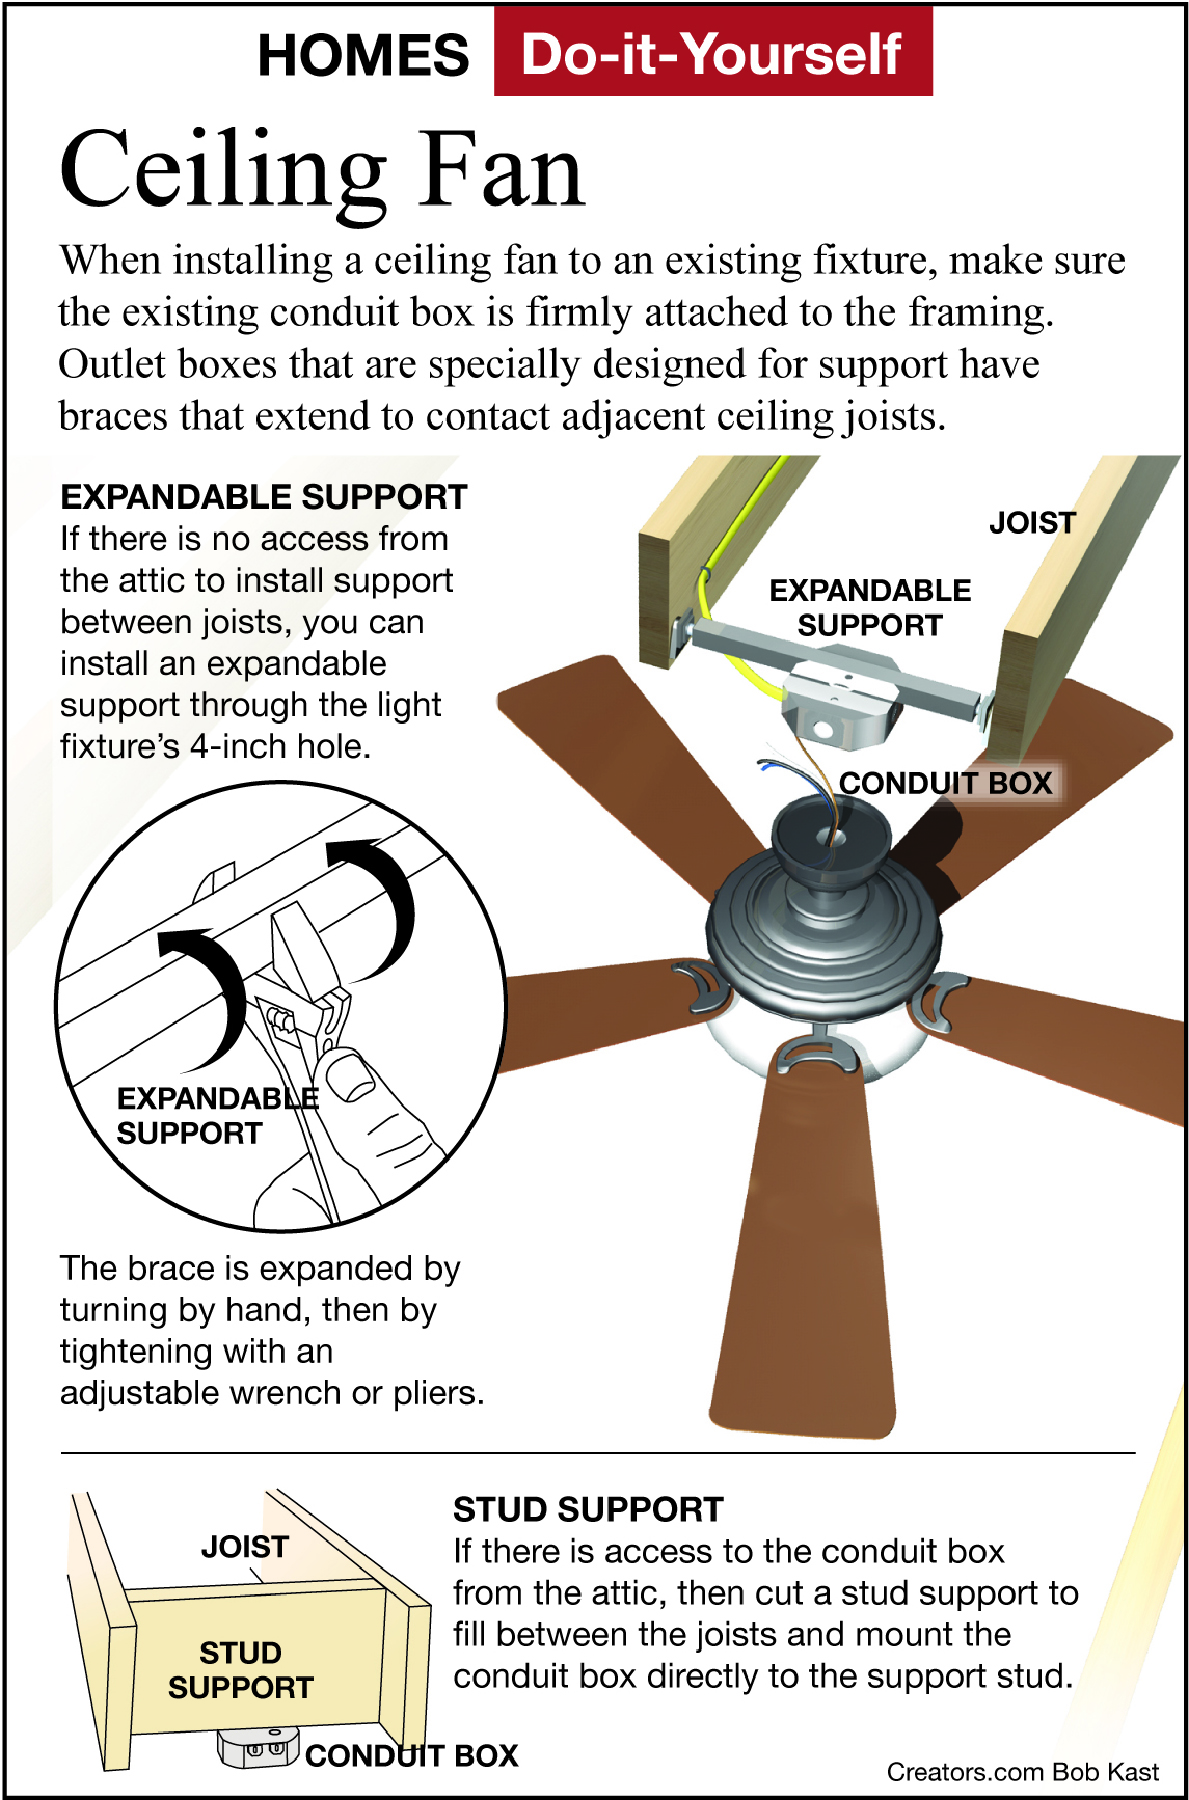
First, remove the existing light fixture and you should find a junction box behind it. If it is a metal box, go up into your attic and brace it with 2x4s between ceiling joists. If it is a plastic junction box, replace it with a stronger metal one. The fan canopy will cover and hide the box.
Follow the instructions with your particular ceiling fan design for attaching the fan canopy to the top of the fan assembly. Attach the fan mounting bracket to the junction box with the screws provided. Hopefully, the mounting will have the hanging hook to initially mount the fan.
Now comes the wiring of the fan. Most likely, the color of the fan wires will match the colors of the wires that were connected to the light. Black is typically the hot side, white is neutral and green is a ground. For safety, don't forget to connect the ground wire. The ground wire coming from the ceiling is probably just a bare copper wire.
To make the next step easier, screw out the mounting screws (all the way less three turns) on the mounting bracket that is attached to the ceiling. Lift the fan up and off of the hanging hook and slip it up over the mounting bracket. Rotate it so that the mounting screws are trapped in the fan slots. Tighten the mounting screws. Attach the blades and you are done.
========
Send your questions to Here's How, 6906 Royalgreen Dr., Cincinnati, Ohio, 45244 or visit www.dulley.com. To find out more about James Dulley and read features by other Creators Syndicate writers and cartoonists, visit the Creators Syndicate website at www.creators.com.
Copyright 2024 Creators Syndicate Inc.


